Safe Workplace Contact Tracing App – Power Platform Solution


Overview
In response to COVID-19, the Safe Workplace Contact Tracing application is a solution that provides SMB organizations with the ability to track the location of both employees and visitors while they are physically on company premises. As this information is collected, Human Resource departments, when required, can provide accurate tracing of all locations visited by an employee or a visitor due to COVID-19 concerns.
The Safe Workplace Contact Tracing App features include the following:
- Ability to configure location zones, so employees can easily identify areas where they will have the ability to report their location
- Provide employees with the ability to easily report their whereabouts, selecting the zone where they are at any point in time,as well as their movements across different zones on company premises
- Provide functionality for HR resources to track visitors’ locations while on premises, and to capture basic information about them and their health for reporting purposes
- Ability for employees or HR users assisting visitors entering company premises, to complete required survey certifying overall health
- Provide the HR department with the functionality needed to effectively inquire and report on an employee’s whereabouts,interactions and location/contact tracing data
Navigating the App
- Download and deploy the Safe Workplace Model Driven App (Admin)
- Download and deploy the Safe Workplace CanvasApp (Employee)
- Use the Model Driven App to manage master data and dashboards (Human Resource Admin)
- Use the mobile CanvasApp to track employee location and presence (Business Admin)
- Use the mobile CanvasApp to record employee health (Business Admin/Employee)
- Use the Model Driven App to report employee and visitor health status and presence (Human Resource Admin)
- Use the Model Driven App to create visitor contact & health information, and report health updates & presence (Human Resource designated Coordinators)
Demo Videos
Click 👇 to see the demo videos (
ctrl + clickto open in Vimeo)
| Employee | Coordinator | HR / Admin |
|---|---|---|
 |
 |
 |
Deploying Safe Workplace Contact Tracing App
This document provides step by step instructions to setup the Safe Workplace App.
Step 1. Download the Deployment Packages
Download the latest deployment packages
-
Core (Model-driven App) Package 👉

-
Canvas App Package 👉
Step 2. Sign Up for Power Apps and Create an Environment
If you do not already have Power Apps, sign up for Power Apps and purchase an appropriate license. Additional information regarding purchasing Power Apps and Licensing can be access here:
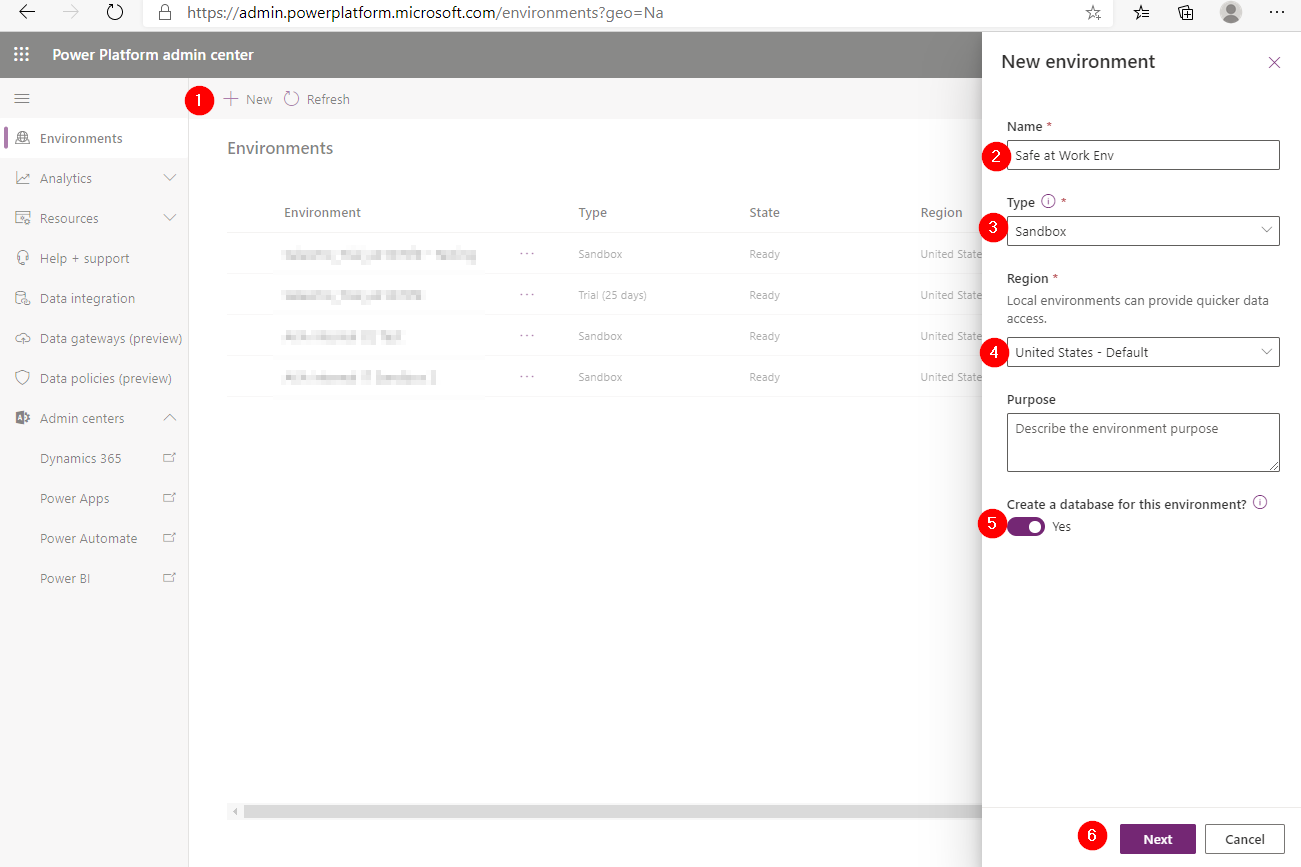
Once you have purchased Power Apps, create an environment with a Common Data Service database.
-
Sign into Power Platform Admin Center
-
Create a Common Data Service environment with the database. For more information, see Create and Manage Environments
[NOTE] While creating the database, if you select a security group for the database, the apps can be shared only with users who are members of the security group.
-
Create appropriate users in your environment. For more information, see Create Users and Assign Security Roles
Step 3. Install the Apps
Follow the steps before installing and configuring the Safe Workplace Tracing App
Install the app using the deployment packages
-
Navigate to the location where you downloaded the deployment packages.
-
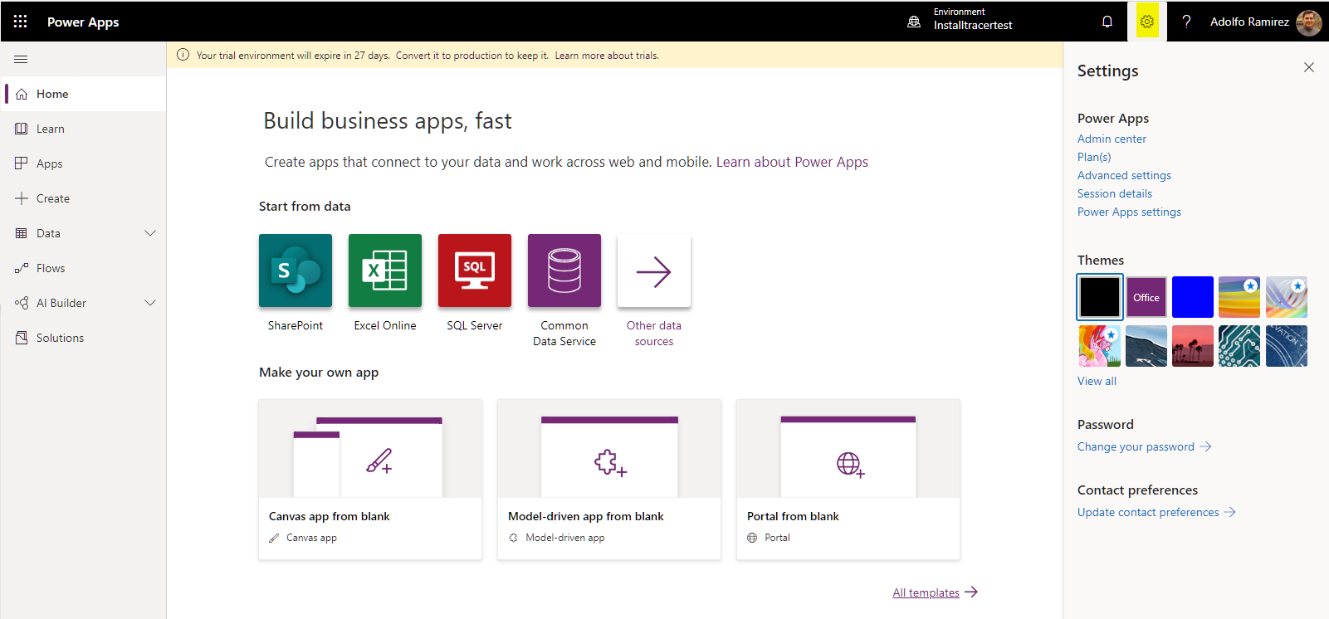
Go to https://make.powerapps.com and login, if needed, with your admin credentials to the environment
-
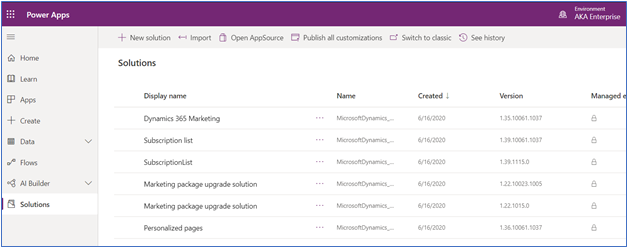
Click on Solutions from the left navigation
-
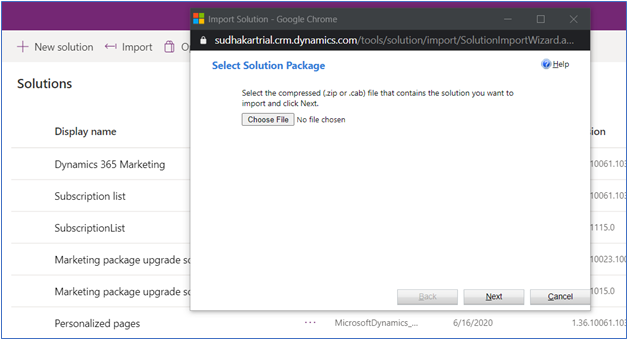
Click on Import from top ribbon. This will open a pop-up window, where you select Solution Package
-
Select Choose file and navigate to the location of package named “ContactTracing_Core_Managed.zip”
-
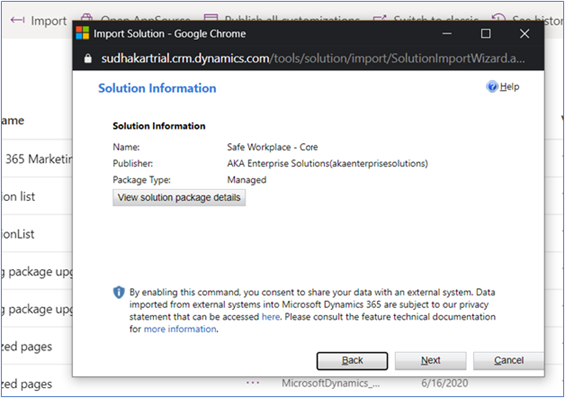
Ensure the solution name is correct and select Next
-
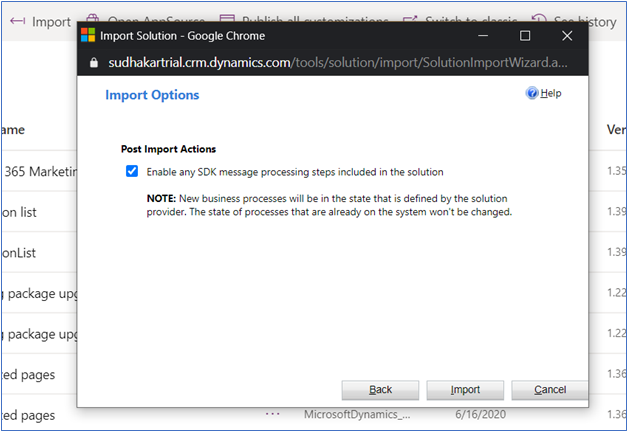
On the next window, select the “Enable any SDK message…” checkbox. Then click on Import
-
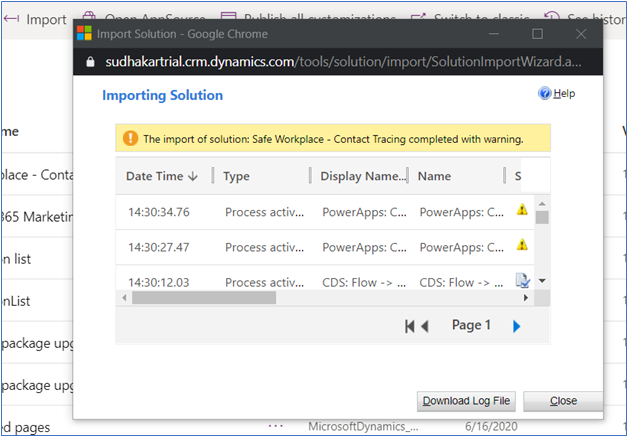
The import process will start running
-
(optional) After the import is complete, select Download Log File and save it. This is just for future reference should any issues arise. Finally, select Close
-
You should now see “Safe Workplace – Contact Tracing” on the list of installed solutions

-
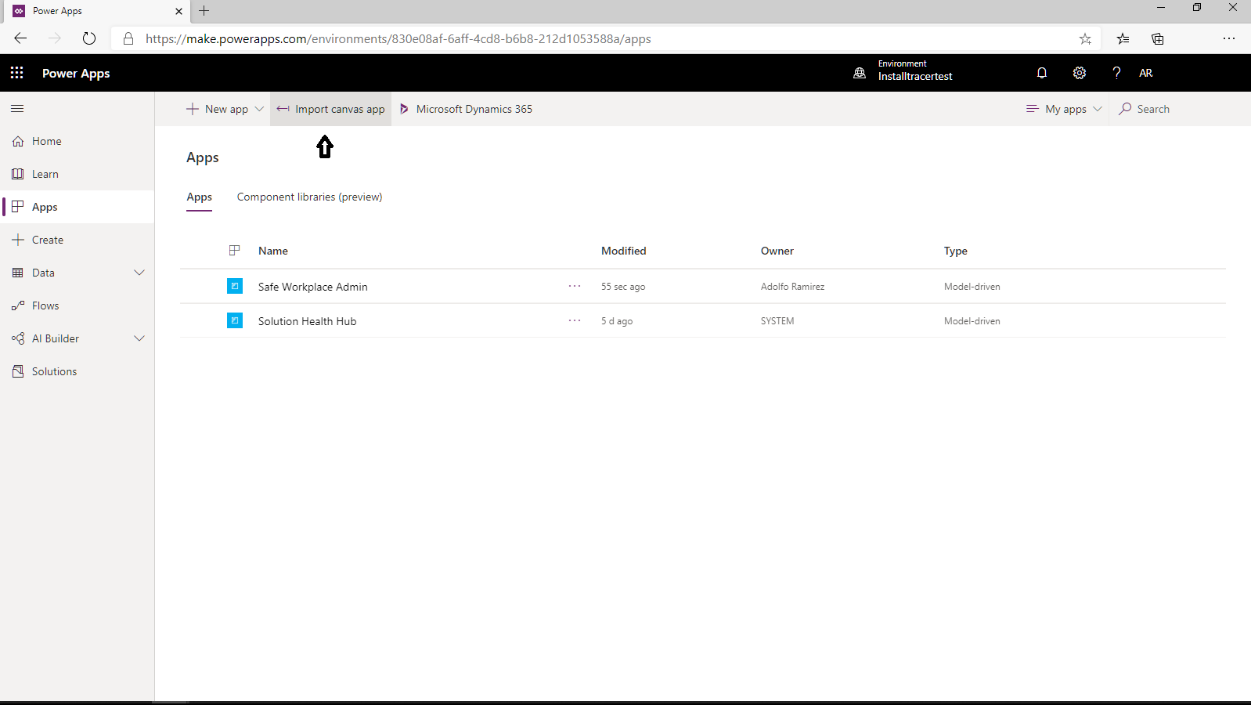
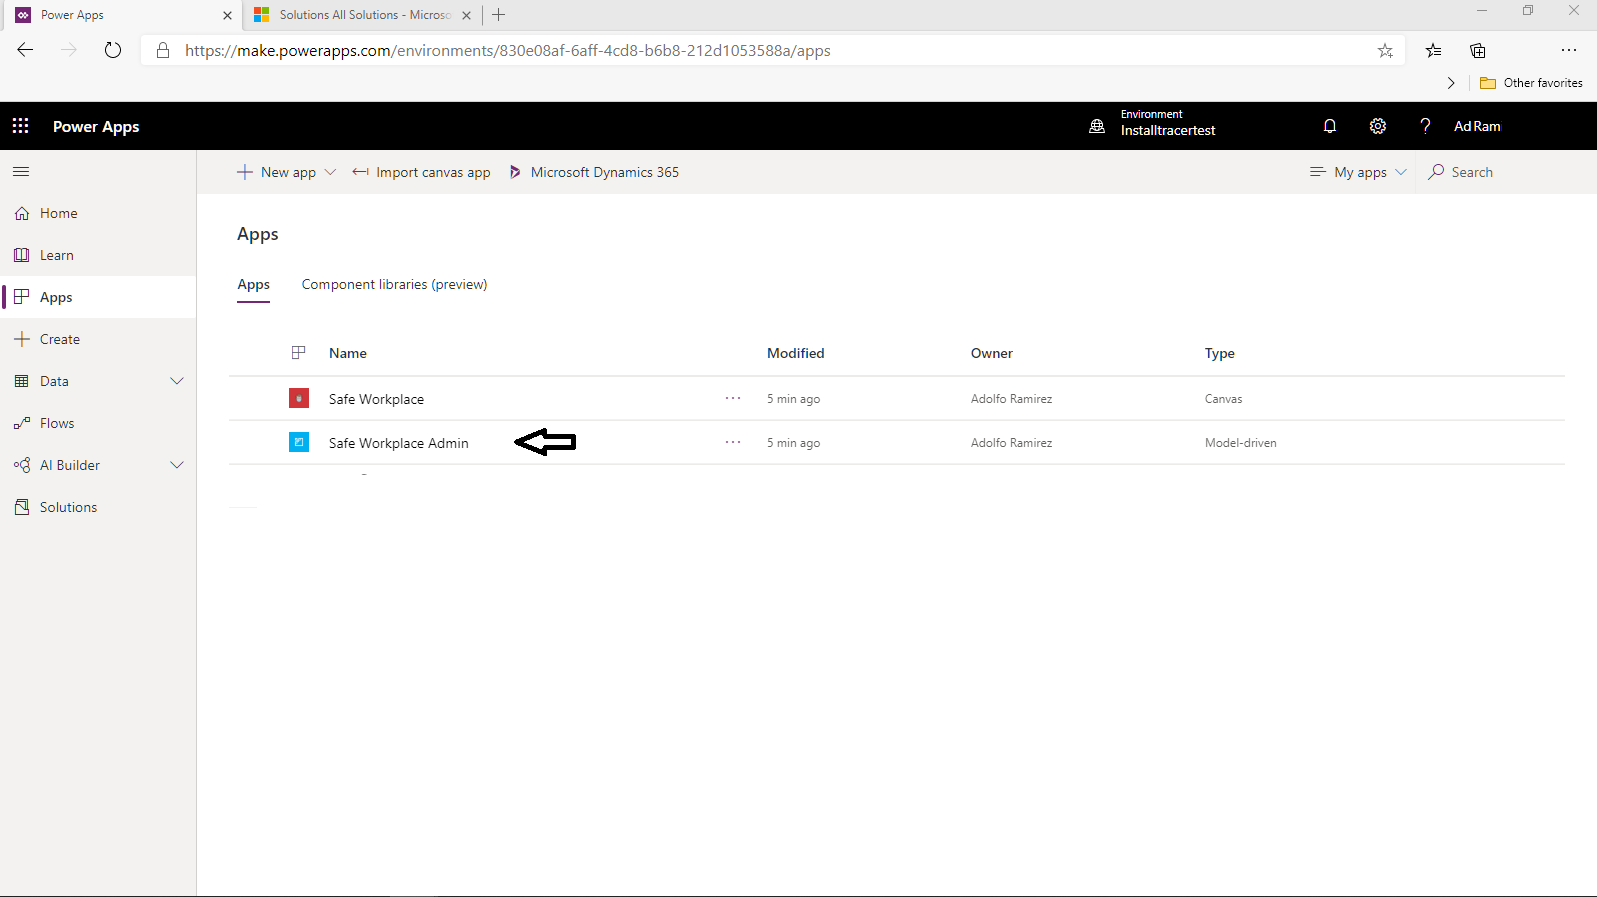
Click on Apps in the left navigation pane to access the apps installed. The Safe Workplace Admin app should now be listed
-
Click on Import Canvas App on the top menu
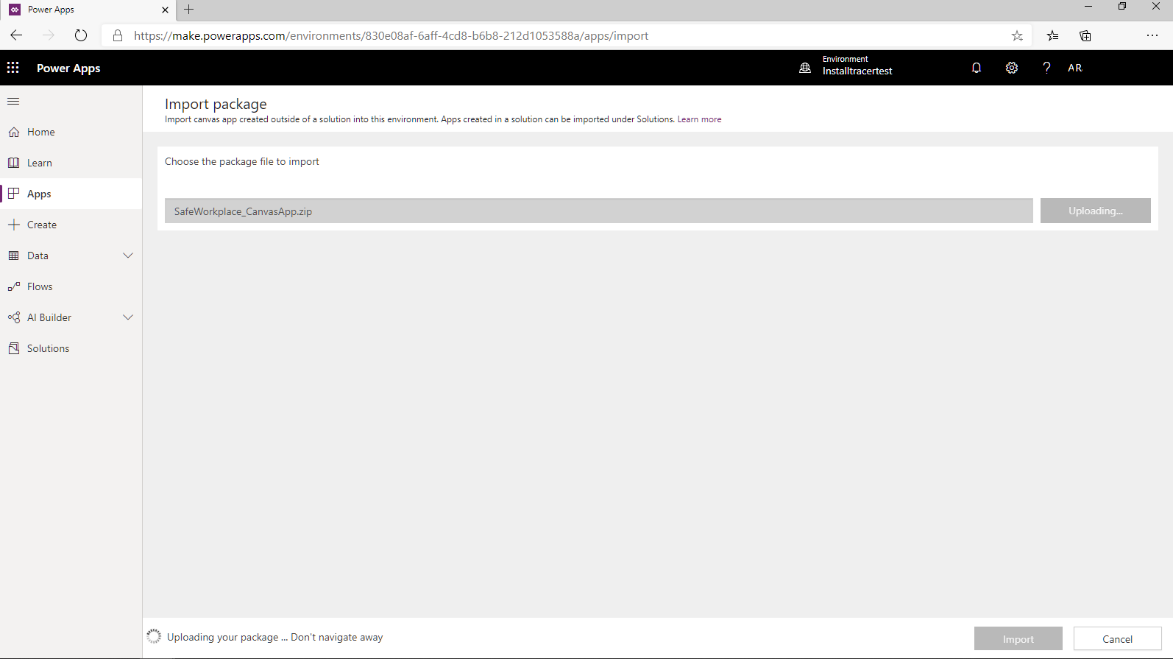
-
Choose the package file to import. Make sure you select the “SafeWorkplace_CanvasApp.zip” file from the location where you downloaded the packages
-
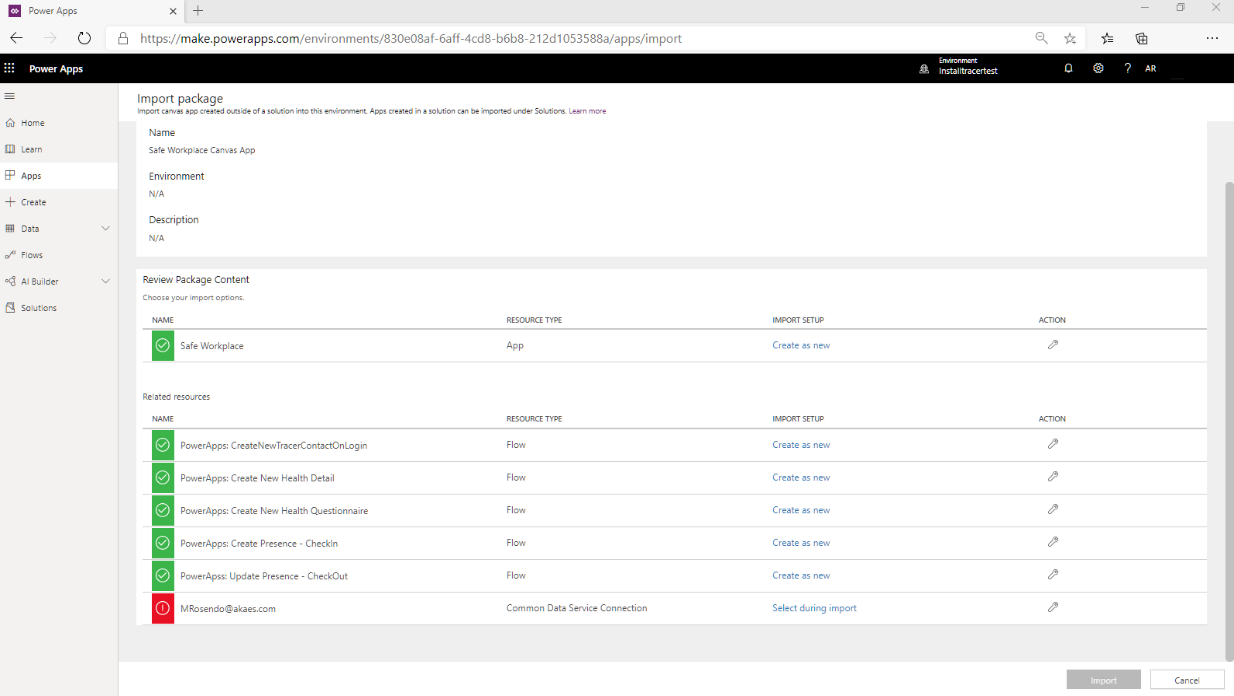
Once the upload is completed, the following validation page is displayed
-
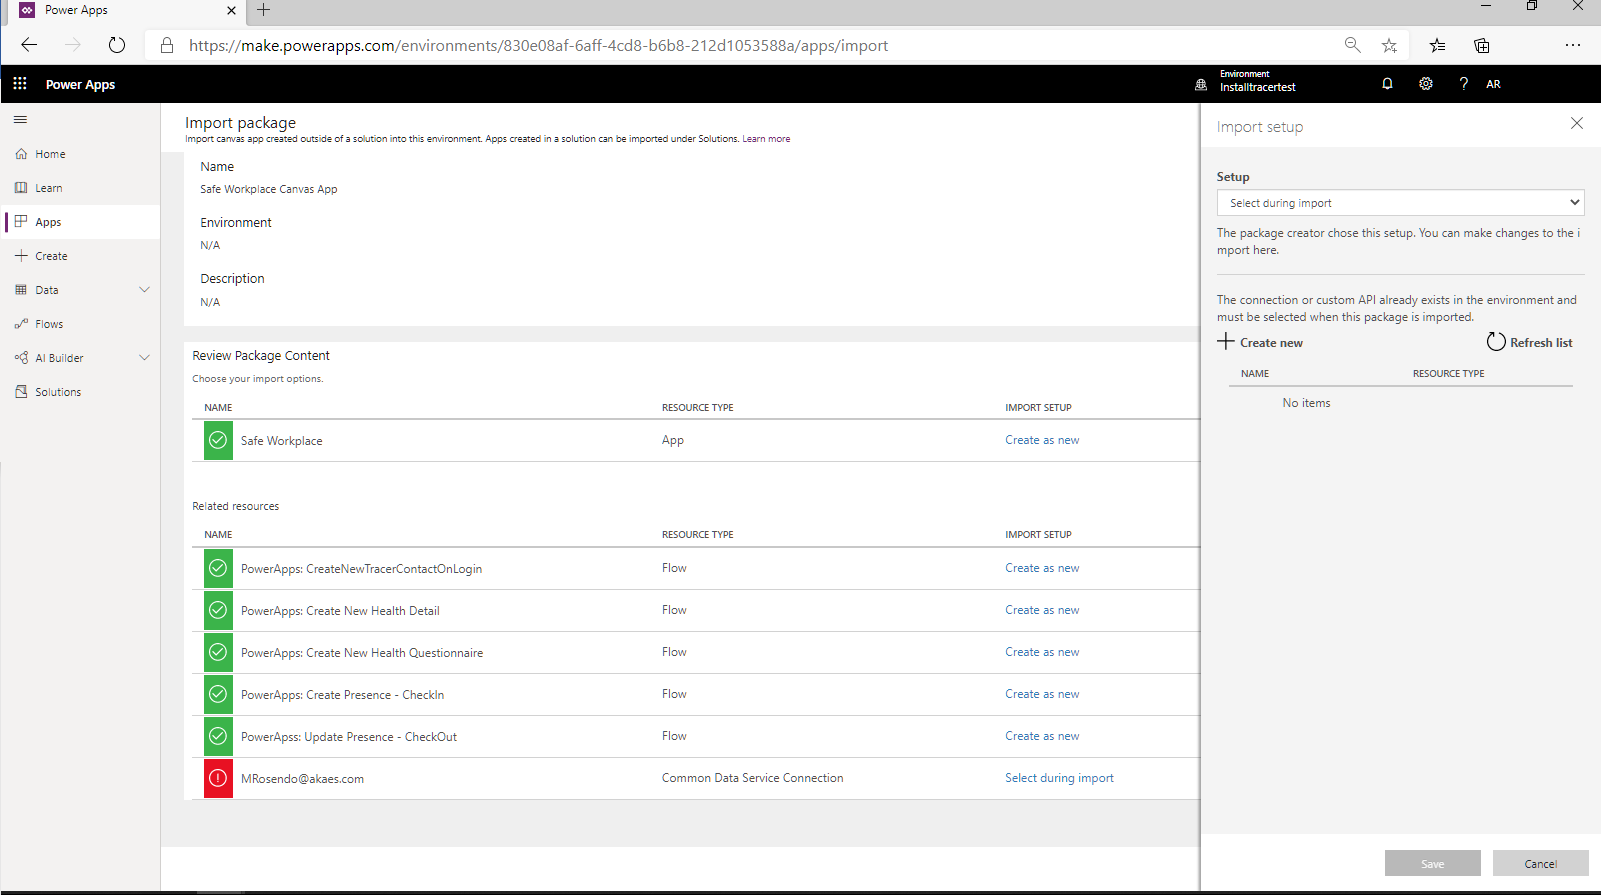
Click on the action icon next to the item marked with a red exclamation icon to setup the common data service connection for the Canvas App. Once the icon is clicked, the Import Setup form is displayed
-
Click the “Create New” button. This will open a new browser window. Click the “Create a Connection button” there. This will open the new connection form to choose a Connection for creation
-
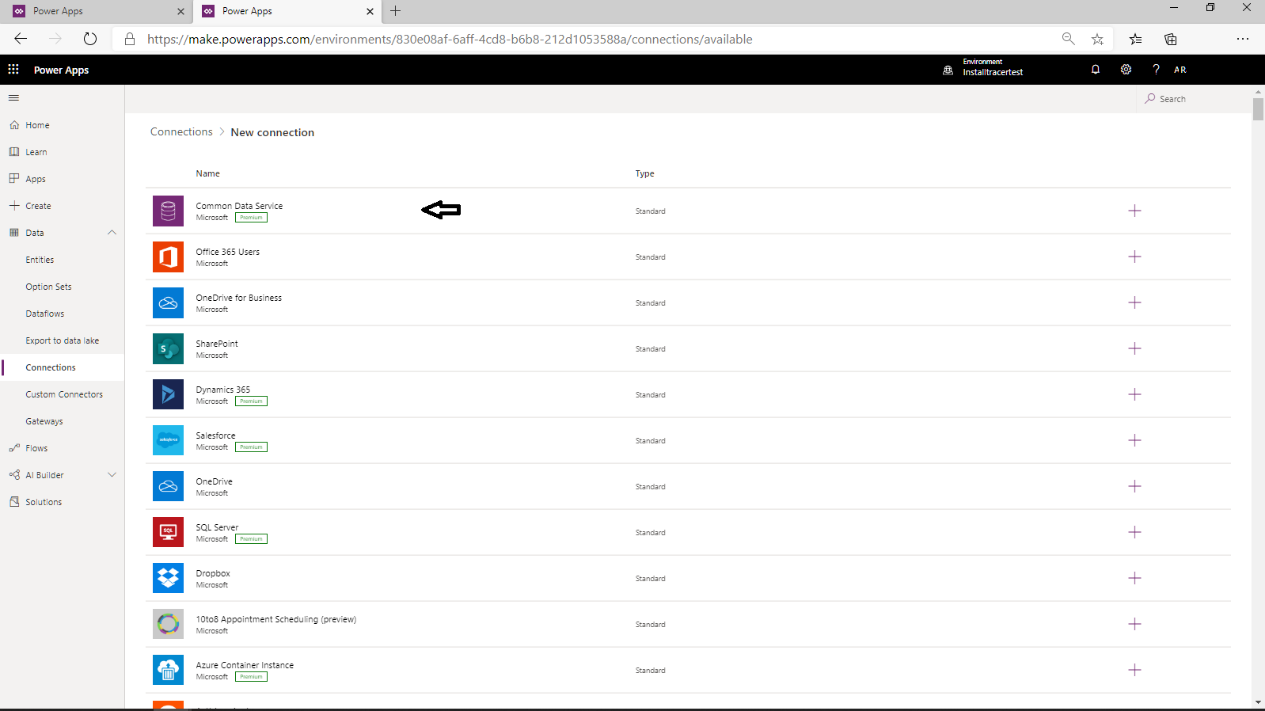
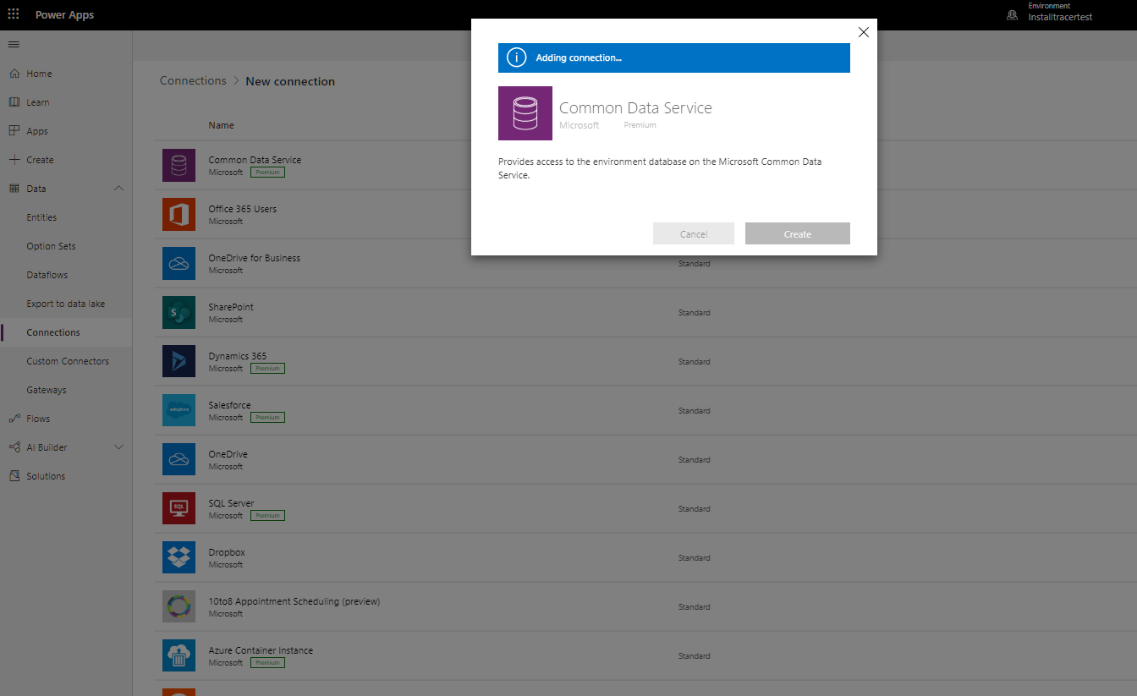
Select the Common Data Service option. Click the “+” icon on the right. On the confirmation message to request creation, click the “CREATE” button. The following message is displayed
-
The application might ask you to login to your environment. Once the process is completed, the data connection is added
-
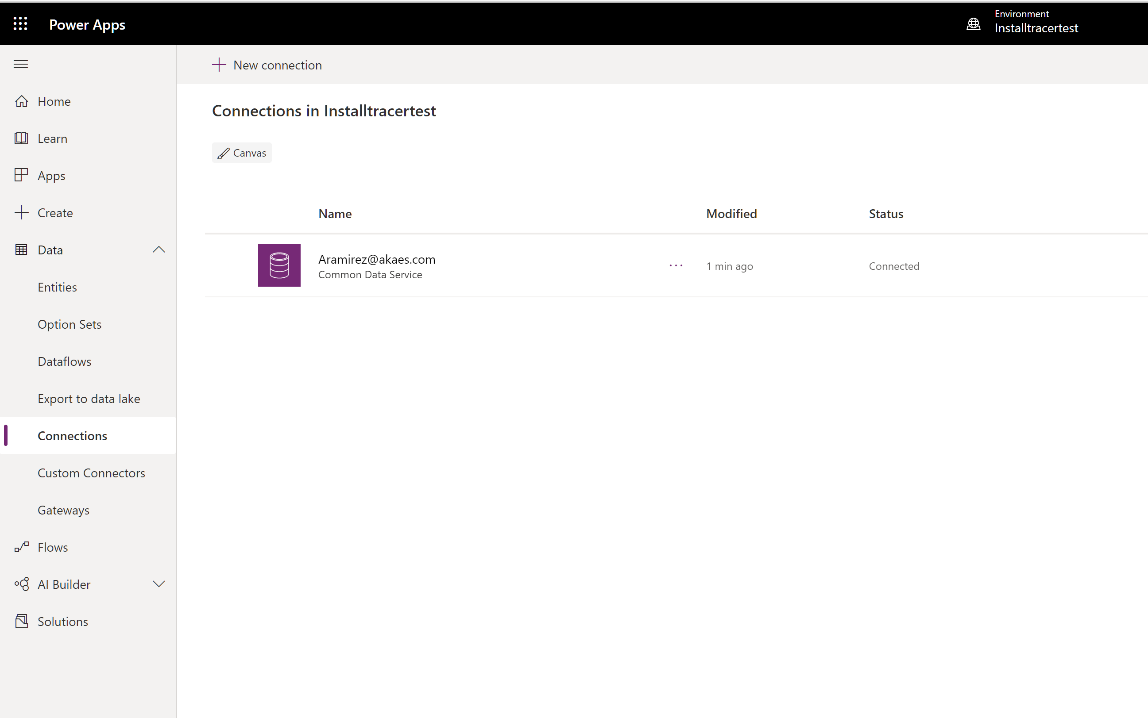
Go back to the import setup. The newly created connection should be there. Select it and then click SAVE

-
The Related resource for data connection is now resolved, the import button should be enabled now. Click IMPORT
-
Once the import is completed, the following message should be displayed

-
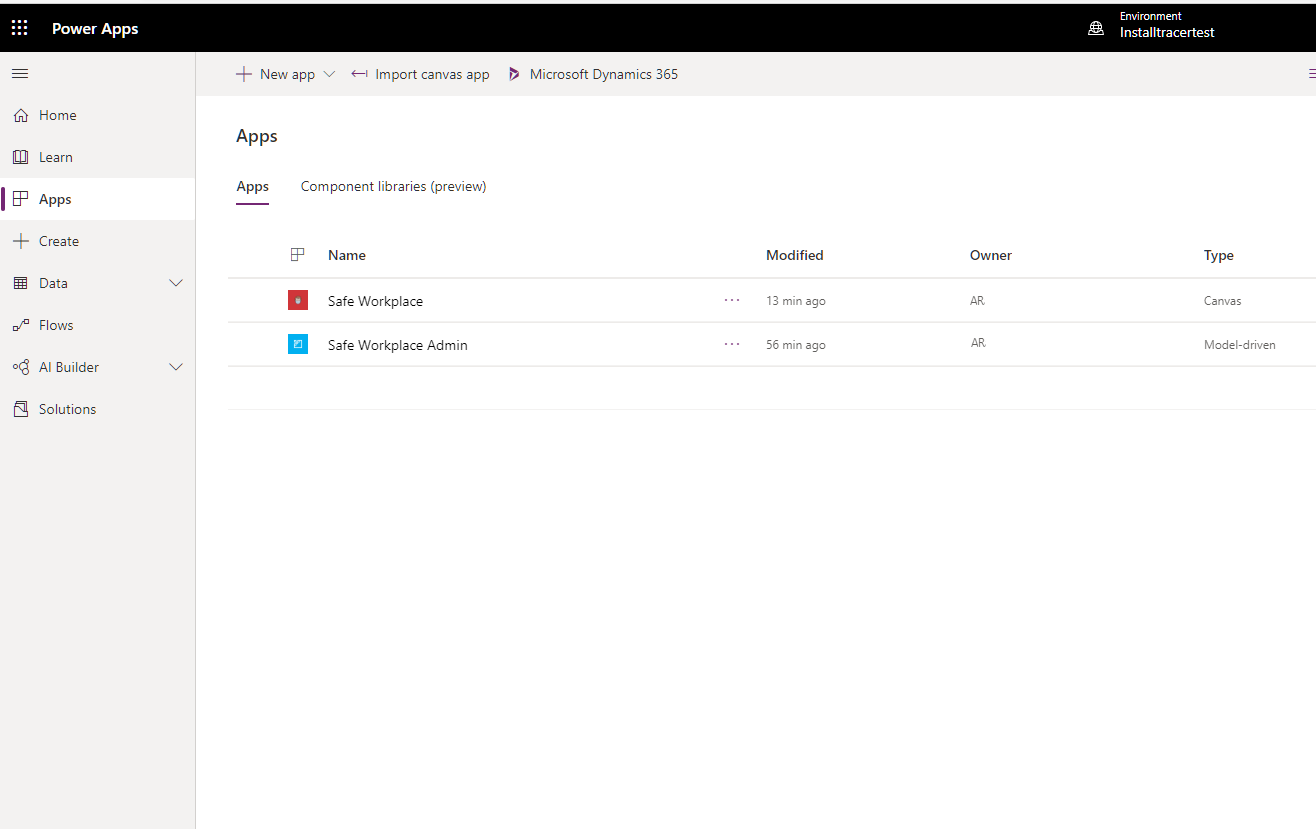
Click the Apps button again. The Safe Workplace Canvas App should now be displayed.
Installation will add the configuration for the Safe Workplace Contact Tracing app
Select the Admin App to open the model driven app that lets you configure the remainder of the deployment settings. The admin app has several entities that allow you to add and manage data for your system. You can use the area picker in the lower part of the left navigation pane to select a different area (Safe Place or Administration). Please review the demo of the solution for more infromation on how to use the Administration options of the app.
Step 4: Update the App Branding and Tracking Level
You can change the app icon or display name of the Admin and mobile apps to match the branding of your organization.
-
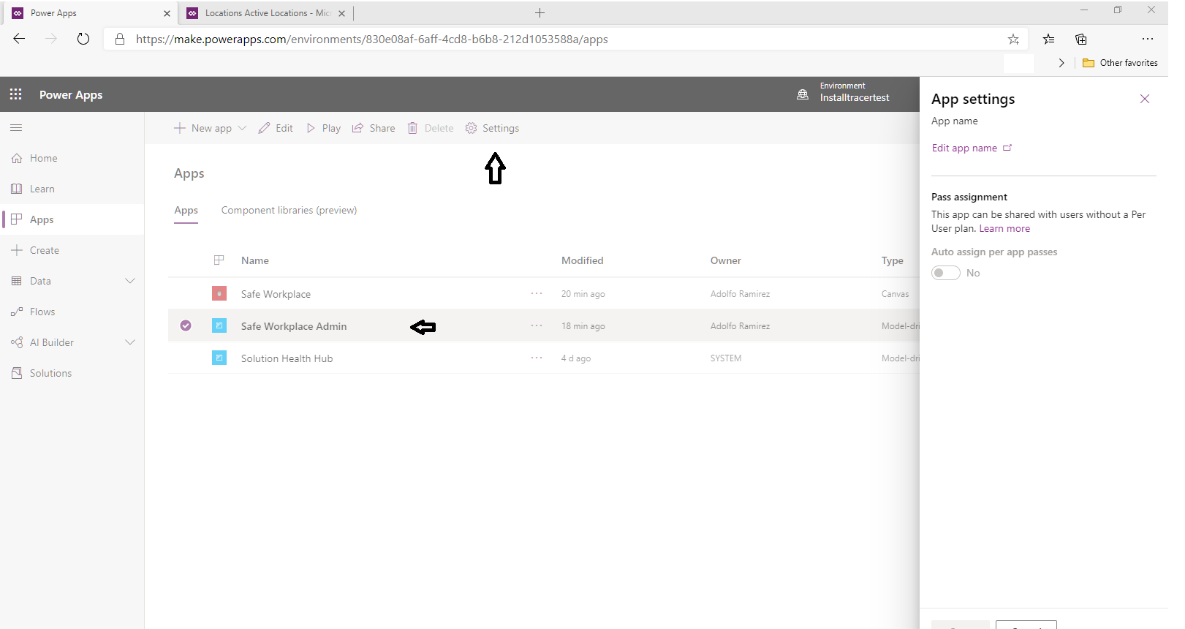
Select the Safe Workplace Admin App on the list of apps. Click on the Settings option on the main navigation menu on the top left navigation
-
The App settings form will open on the right side of the screen.
-
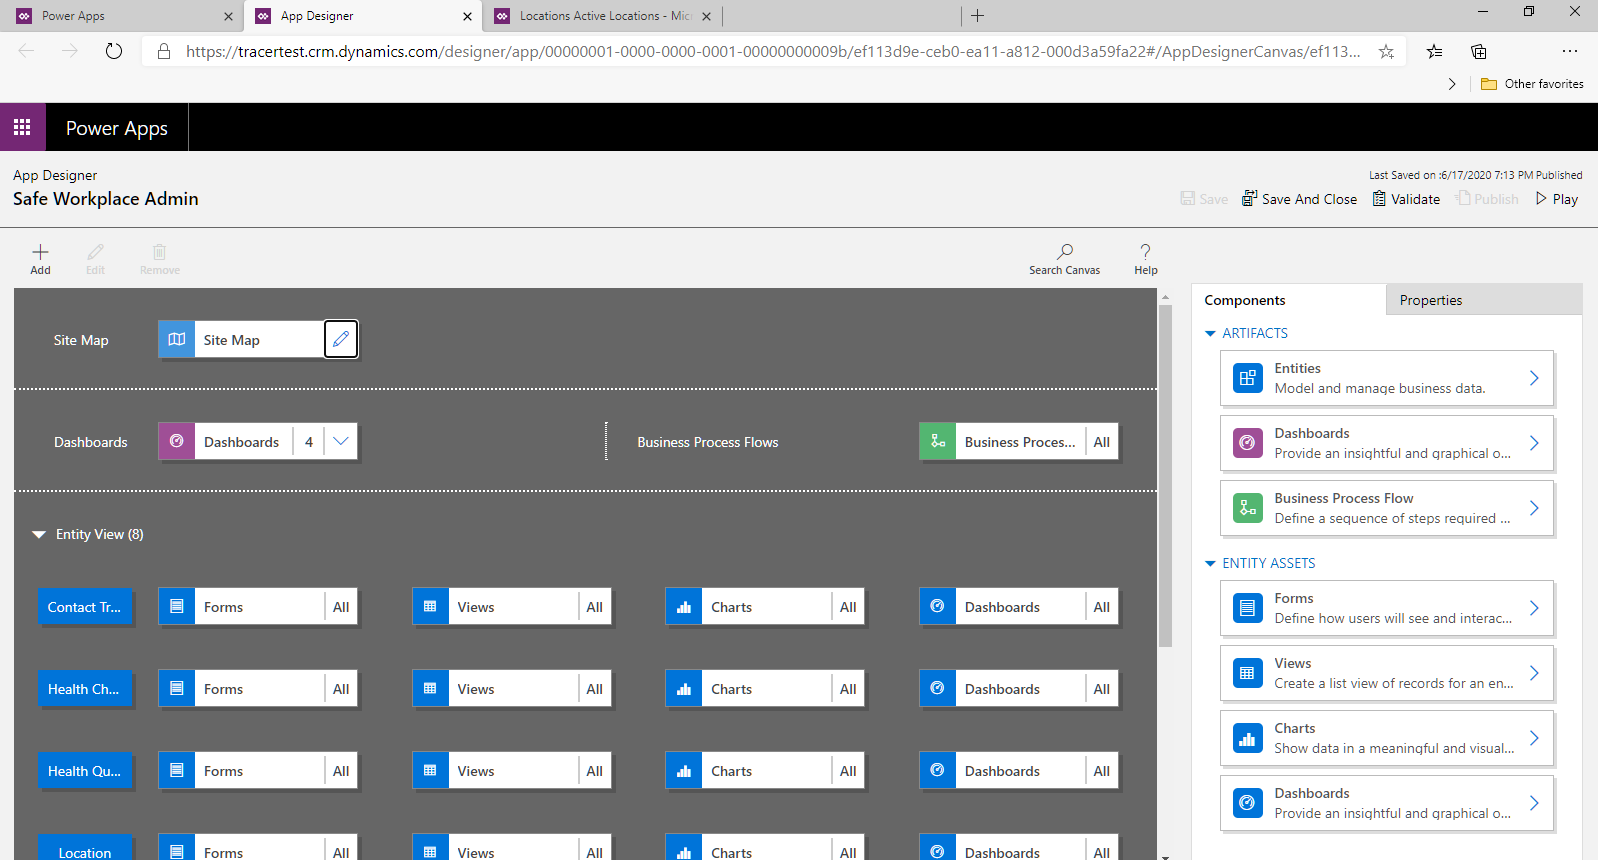
Click on the Edit App Name link. This will open the app designer form
-
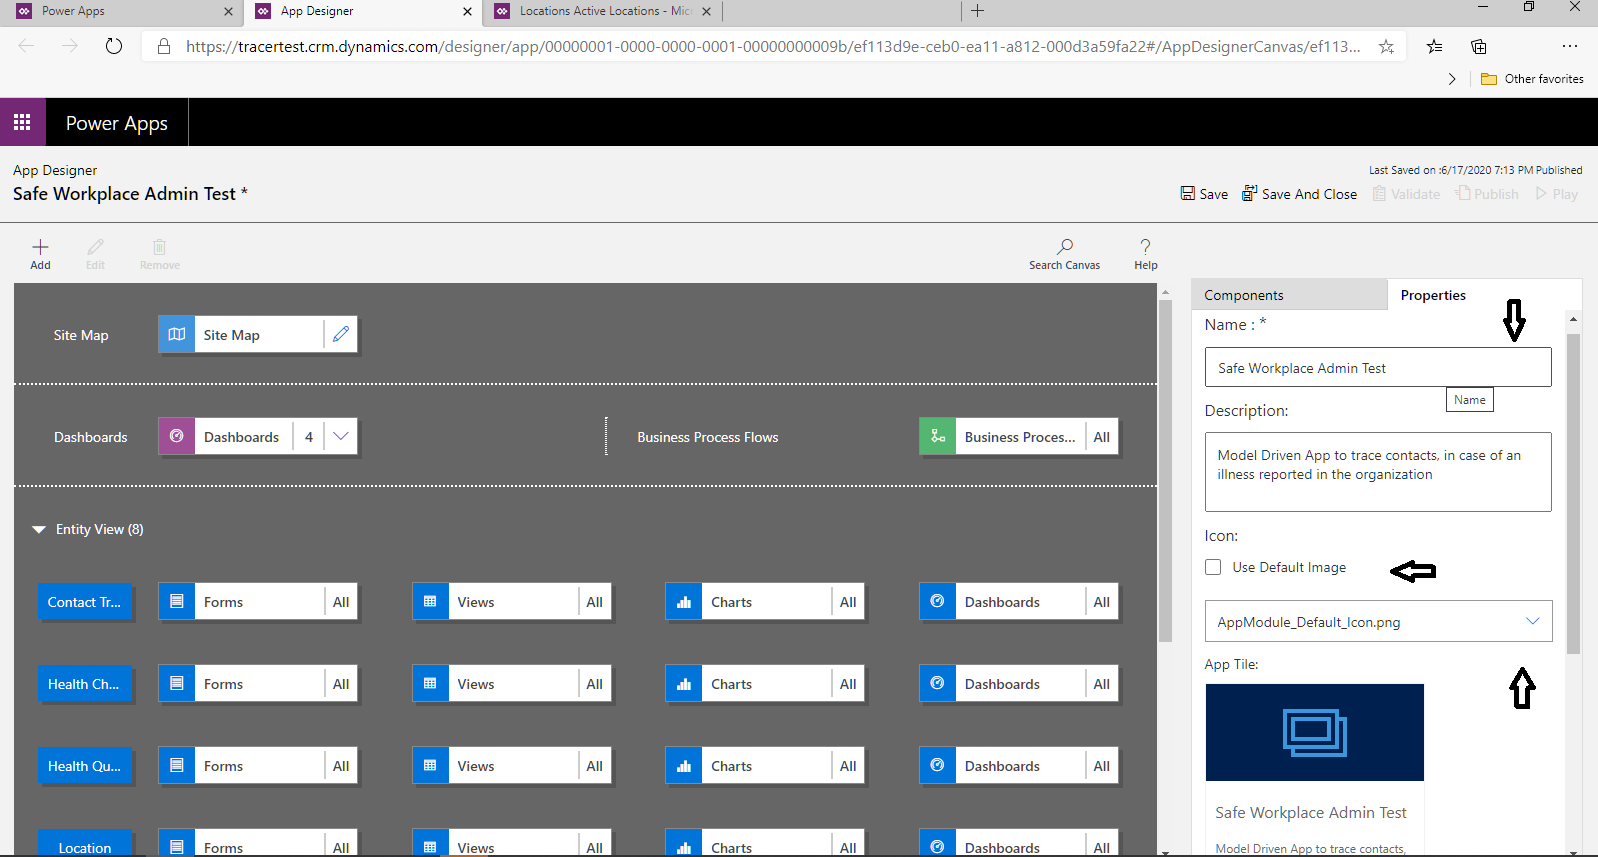
Click on the Properties Tab of the App details section. The following elements can be changed:
-
To select a custom image for the app icon as per your organization branding, uncheck the “Use Default Image” checkbox and then select the icon file of your choice
-
If necessary, update the Description or Display Name of the app
-
Select Save and Close and then Publish
-
To update the App Name and sharing settings for the mobile app, follow these steps
-
Select the Safe Workplace App on the list of apps. Click the Settings option on the main navigation menu on the top left navigation
-
The App settings form will open on the right side of the screen.
-
Click on the Edit App Name link and then enter the new App Name.
-
Select Yes or No in the Pass Assignment option to allow the app to be shared with users without a Per user Plan
-
Select Save in the lower-right corner to save changes
Step 5: Add Azure Application Insights Key to Mobile Apps for Telemetry (Optional)
Optionally, you can use Azure Application Insights to collect detailed telemetry for your mobile apps (canvas apps) to get insights on the app usage. For additional information, see Analyze app telemetry using Application Insights.
Step 6: Share Canvas App with Users in the Organization
For employees to use the canvas app on their mobile devices, the app must be shared with them. It is easier to use Azure AD groups to easily share apps with groups of users.
NOTE: Make sure the user and/or group already has access to the environment. Typically, you would have already added users or groups while setting up your environment. You can also follow the steps below to add users to your environment and provide the correct access before sharing. For more information on how to create users and assign security see Create Users and Assign Security Roles
-
Sign into Power Apps
-
Select Apps to view list of Apps
-
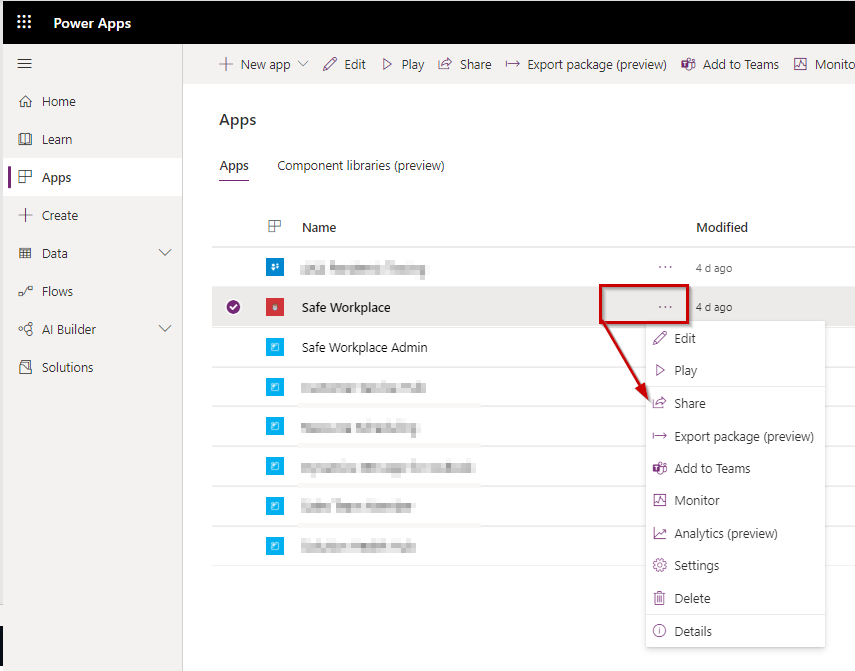
Select the mobile app then select Share
-
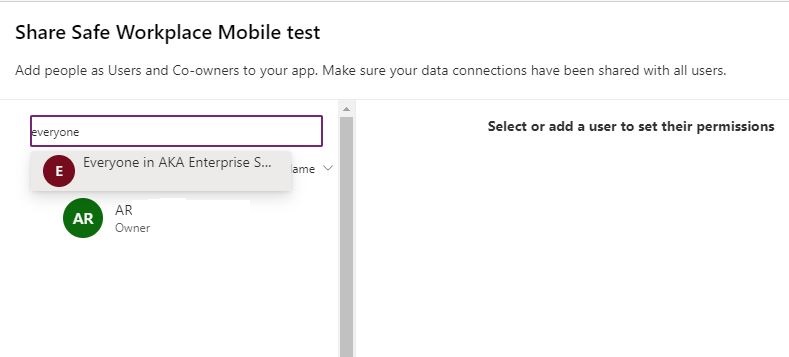
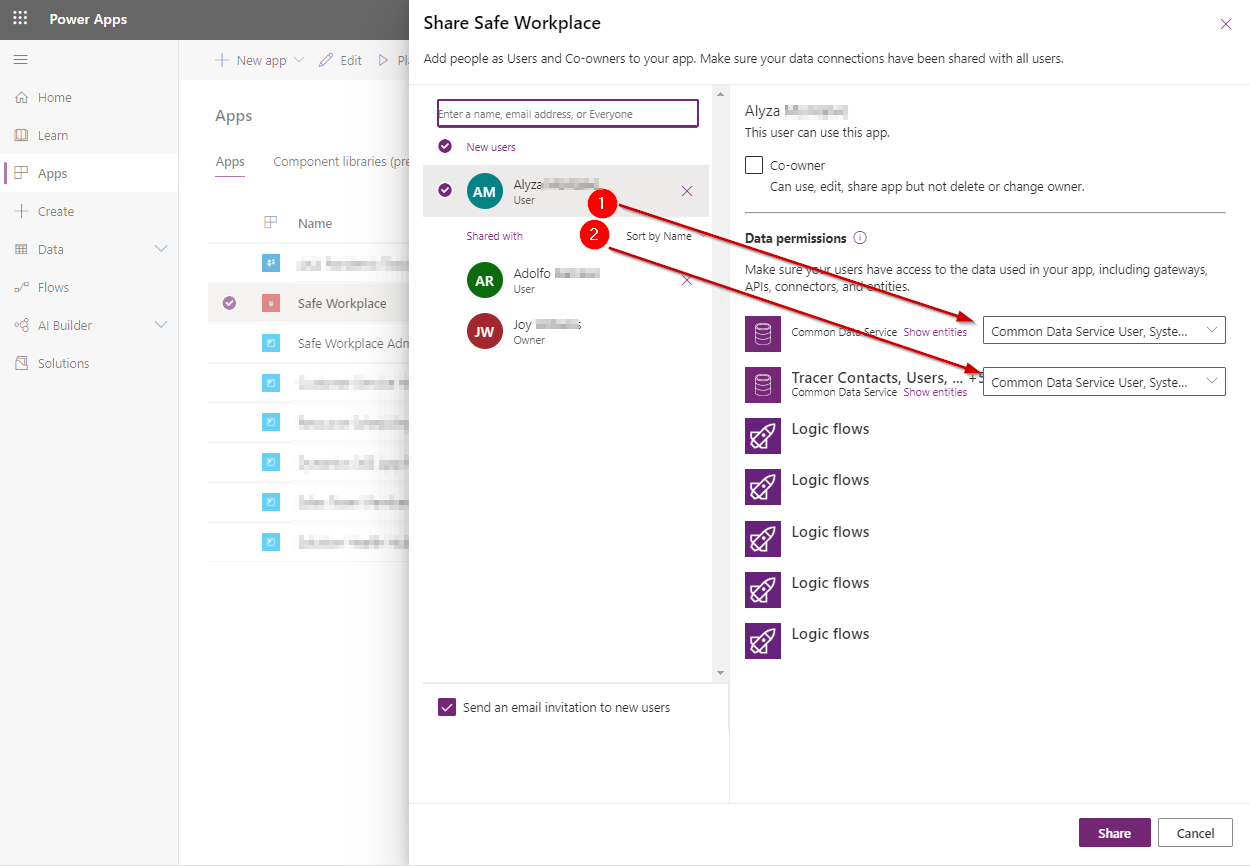
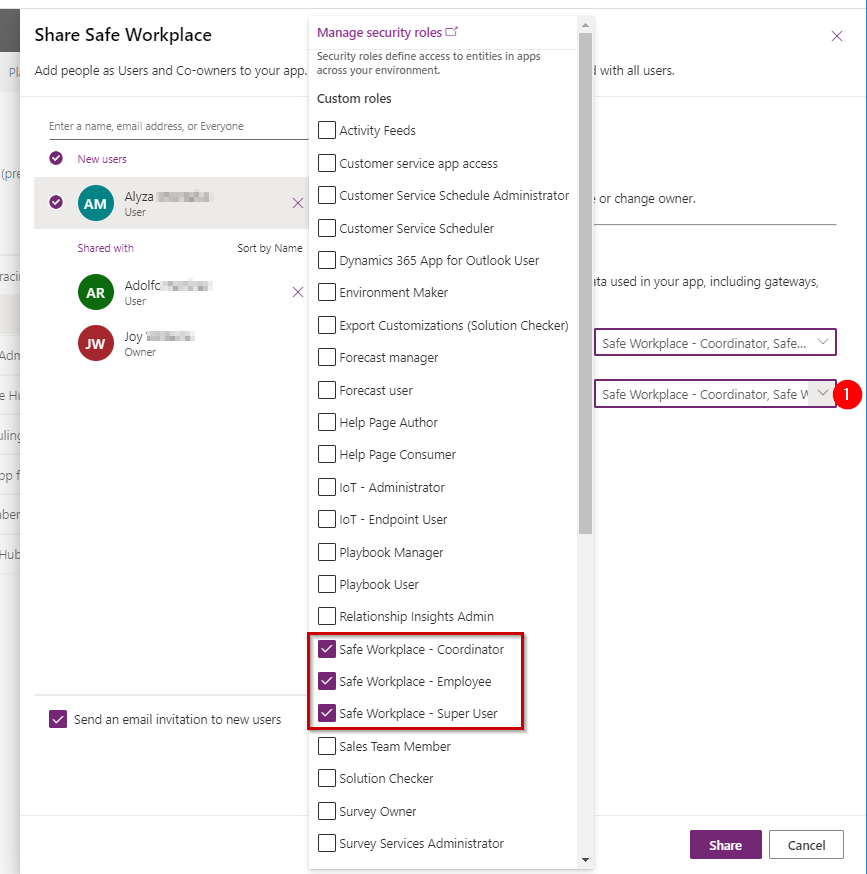
You can share the app with all the users in your tenant, by using “Everyone” as the option to choose users, but this will not allow you to assign security roles. In order to assign security roles, you need to select Azure AD group or individual users that the app will be shared with, in order to be able to select the proper security role for them
NOTE: Read more about Safe Workplace security roles
-
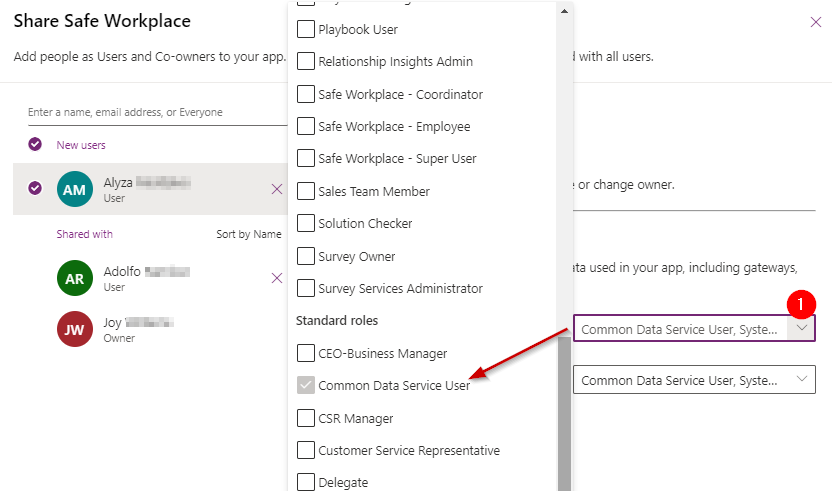
Next, permission to the entities will need to be provided. To assign the respective user role necessary, first select the Common Data Service User role. You can then assign the applicable role for the user, Safe Workplace Super User, Safe Workplace Coordinator, or Safe Workplace Employee)
Step 7: Pin Mobile App to Home Screen on your Phone (Optional)
As an option you can pin your mobile app to your home screen, to avoid the need to open the Power Apps application to access the Safe Workplace App. To do so, follow these steps
-
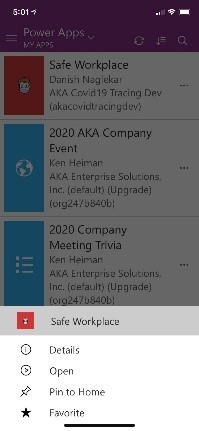
Open your Power Apps application on your mobile device
-
The Safe Workplace App should be listed, Click “…” icon. The following options should be displayed at the bottom: Details, Open, Pin to Home, Favorite
-
Click Pin to Home option

-
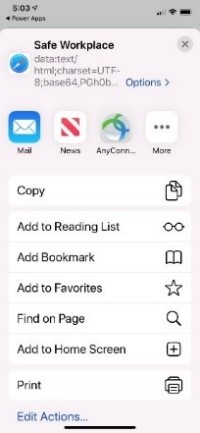
Then, click the Icon indicated here to add the app to the home screen
-
Click the add to home screen option as shown on the image
-
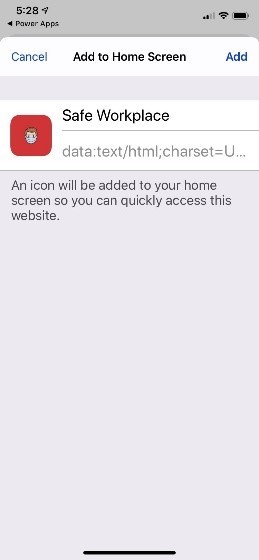
Click the add option. Once completed, the app will be displayed as any other icon on the home screen of your mobile device
Step 8: Share the Model Driven App with Organization Admins
The Model Driven app must be shared with organization admins for use. To do so, be sure the user and/or group to which the app is being shared already has access to the environment.
-
Sign into Power Apps
-
Select Apps to view a full list of Apps
-
Select Model Driven App and select Share
-
Specify the Azure AD group or admin users the app will be shared with. Assign the Safe Workplace Super User (Admin) security role and share
Step 9: Set Flows Connections and Enable them for Execution
You must set the connections and enable the following flows to help with various processes in the solution. The following flows will need to go through the steps indicated below:
- CDS: Flow > Automated Presence Checkout
- CDS: Flow > Health Notification to HR
- CDS: Flow > Set Preferred location in Contact
Follow these steps:
-
Sign into Power Automate
-
Go to the Environment drop down selection located on the top right corner of the form, and click it to select the proper environment where the application has been installed.
-
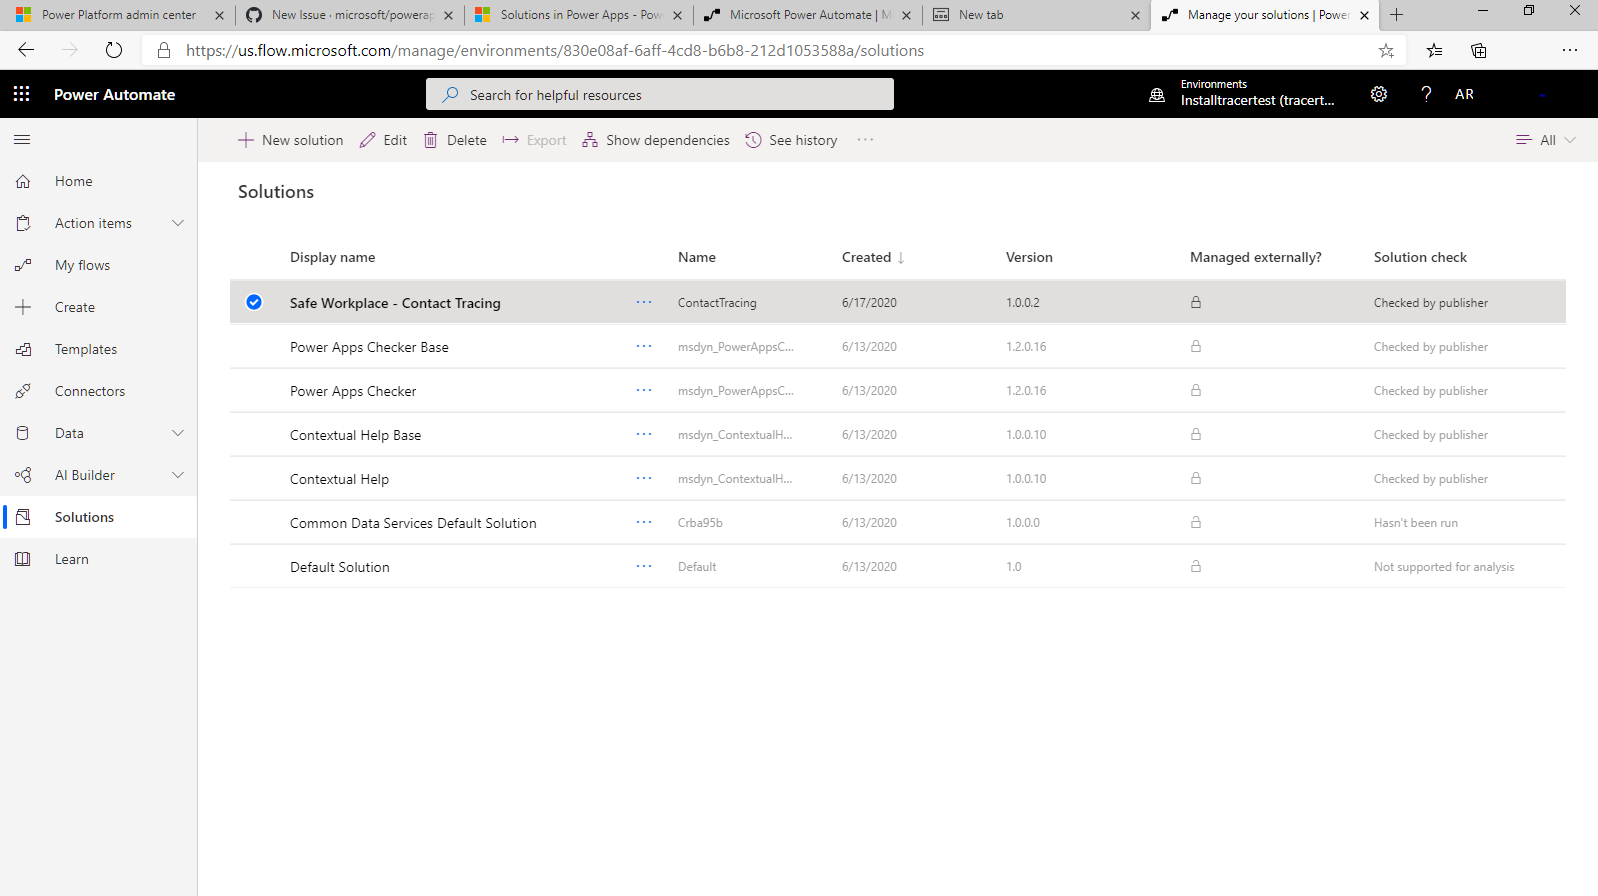
In the left pane select Solutions. From the solution list, select Safe Workplace - Core to open solution.
-
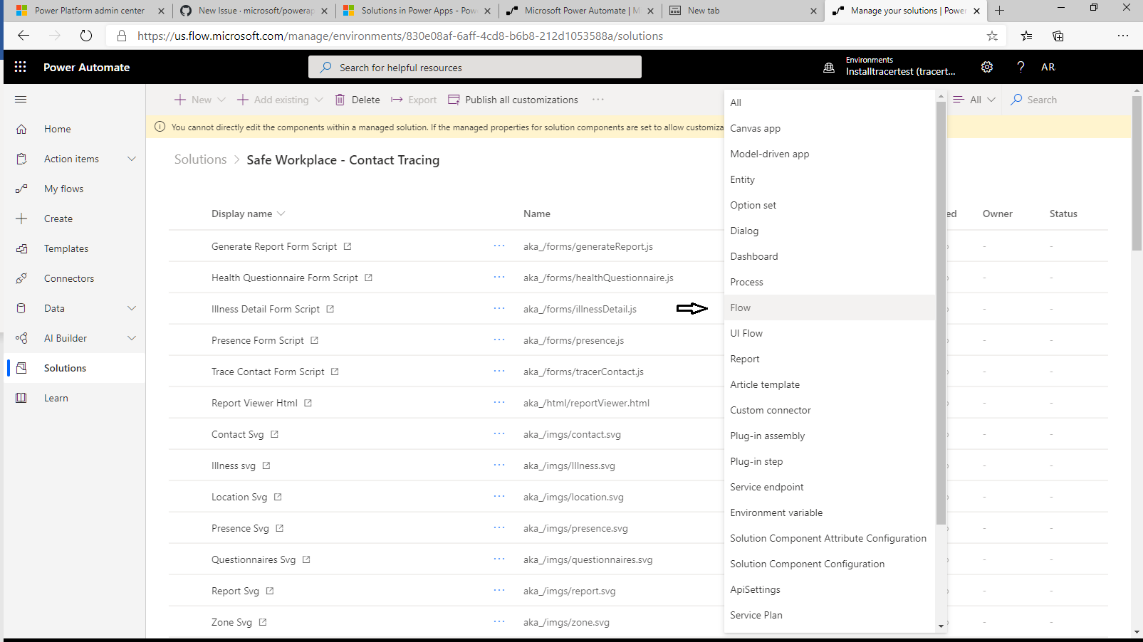
In the solution, filter on Flow to find all the flows.
-
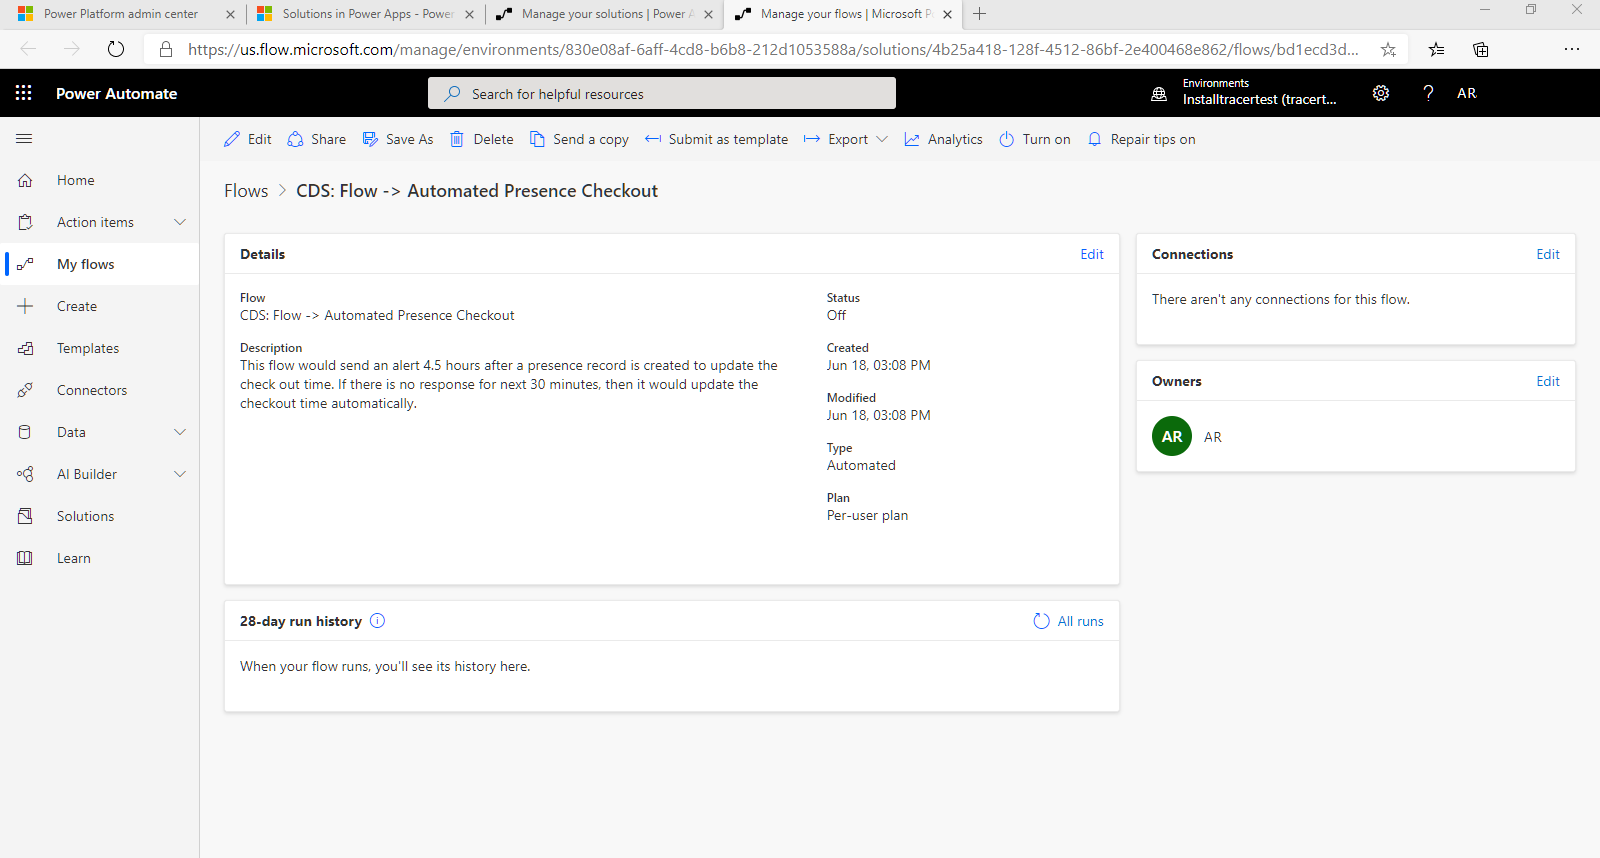
Select the flow name to open the flow definition. For example, CDS: Flow > Automated Presence Checkout
-
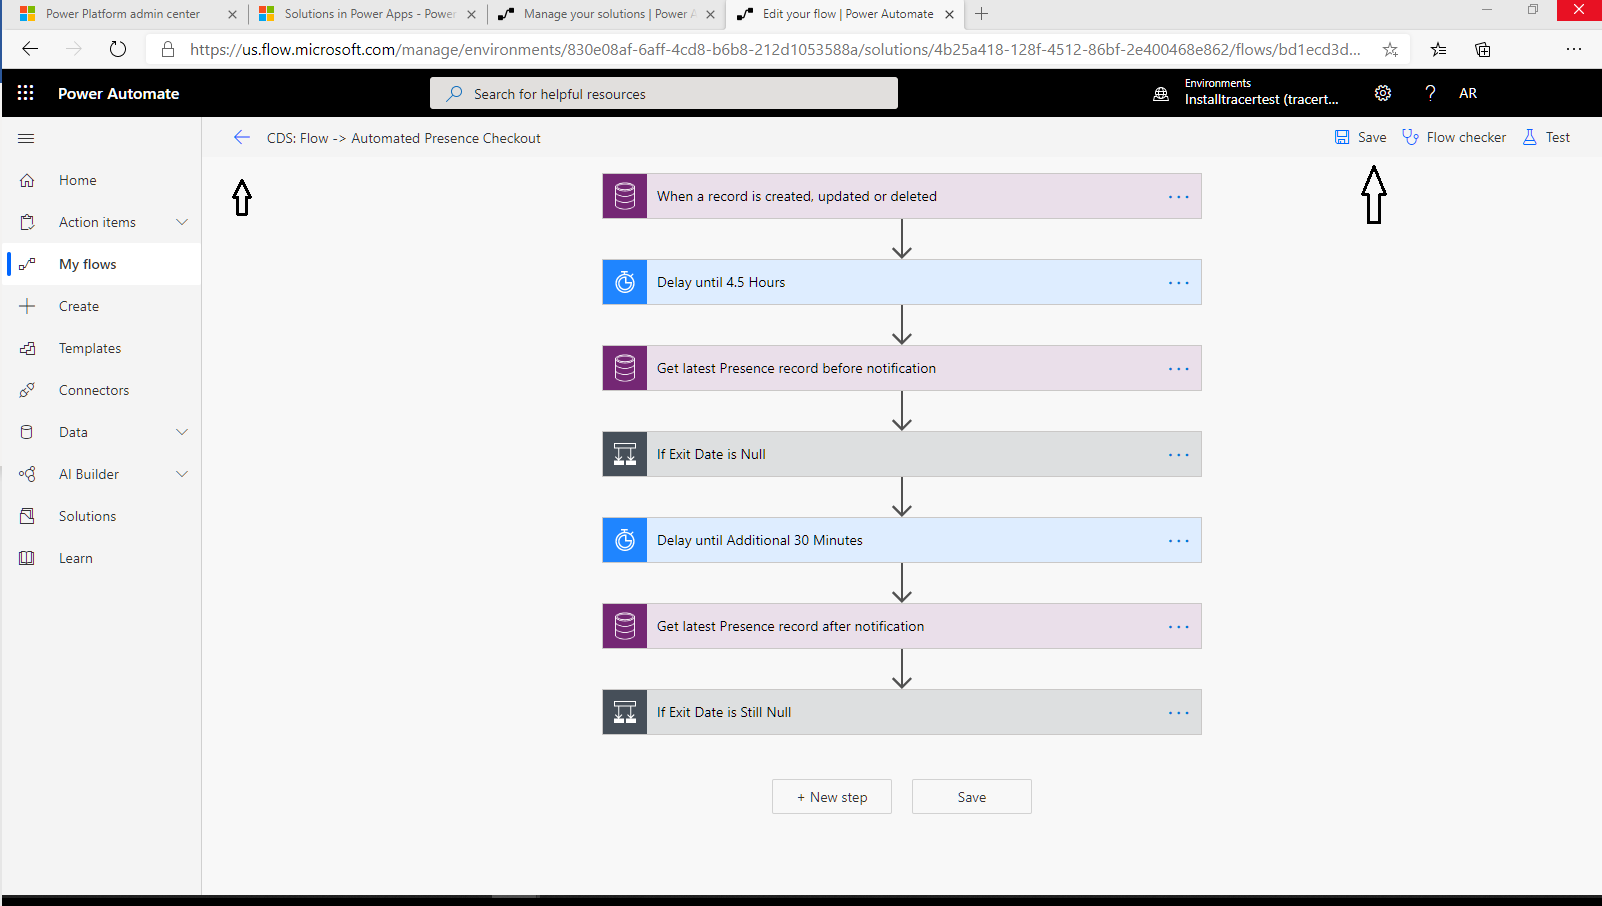
Double click on the flow name to open it. which will take you to the details form. It should look like this
-
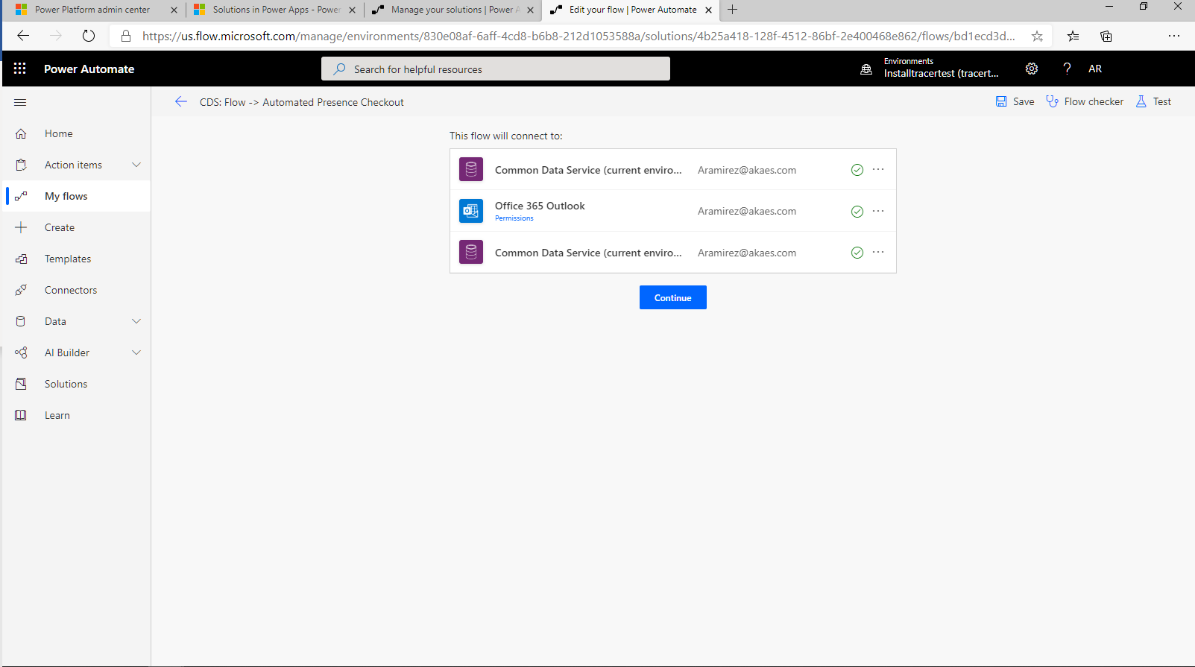
Click the Edit button on the menu. A screen confriming the connections for the flow will be displayed. It will look like this:
-
Click Continue to update all your connections, click Save to save the changes to the flow, then click the Back arrow to go back to the flow details page
-
Select Turn On and then close the browser session for the flow being edited. the flow is now active.
-
Perform steps 4-8 for each of the flows listed above
NOTE: An additional change that could be done by an administrator user is to update the “delay until 4.5 hours” step in the flow, which is now set to wait for that specific period of time before emails are triggered, reminding the users to checkout of zones they have not done so for a while. User can open the flow step and change the value to any other amount of time that makes sense according to their company policies. Save the changes made to the flow
Step 10: Prepare the apps for testing and use
Once the installation is completed, there are a couple of setup steps you need to follow in order to allow the users to start using the app right away. For users to be able to report their presence, locations and zones need to be configured. To do so, follow these steps:
- Create a New Location Record
On the administration section, users will find the location option under the master details section. To create a new location, follow these steps:
- Click on the Locations options
- The system will display the active locations view, with the list of all locations created
- To edit one of the existing locations, select the location record and click on the Edit button. This will open the Location information form. Make any changes and then Save the changes
- To create a new Location, click on the “+ New” button. This will open a brand-new location information form
- Provide a name. This is the only required field
- Enter the address details for the location (optional)
- Click on the save and close button
- Create a New Zone Record
On the administration section, users will find the zones option under the master details section. To create a new zone, follow these steps:
- Click on the Zones options
- The system will display the active zones view, with the list of all zones created
- To edit one of the existing zones, select the zone record and click on the Edit button. This will open the zone information form. Make any changes and then Save the changes
- To create a new zone, click on the “+ New” button. This will open a brand-new zone information form
- Provide a name.
- Select the location for the zone. Click on the lookup to see the list of active locations and select one
- Enter the capacity and exposure level values(optional)
- Click on the save and close button
NOTE: Please review the HR Admin Video to get more details on how to setup these items.
Security Role Definations
- Safe Workplace Super User
- Super user role provides access to all entities, health dashboards related to Safe Workplace App. User can run “Contact Tracing” and “Employee Zone” reports.
- With this role, users can create/update/deactivate following entites: Tracer Contacts, Presences, Locations, Zones, Health Questionnaries and Health Changes.
- Super user also receive email notifications when heath changes are reported.
- Safe Workplace Coordinator
- This role has create/update permissions to following entities: Tracer Contacts (with type Guest), Presenses, Health Questionnaries and Health Changes
- Coordinator role can check-in Guests to company Locations and record a Guest’s presence within a location by identifying the Zone a Guest enter and exit on a given date and within a given time.
- Coordinator can create Health Questionnaires to track a Guest’s health and report any changes in their health via the Health Change entity
- Coordinator cannot modify employee – related records or run tracing reports
- Safe Workplace Employee
- Employee users only have access to the mobile app to document their presence within the organization’s location and zone by checking in and checking out of a selected location.
- An Employee can record their health status via the Health Questionnaire and report an illness, using the canvas app as well.
Bypassing Consent
Once your Canvas App is installed you may observe that each users need to provide consent on the connectors. This can be bypassed by executing a PowerShell command by the admin.
Open “Windows PowerShell ISE” and copy-paste below command. Click execute command button.
Install-Module -Name Microsoft.PowerApps.Administration.PowerShell
Install-Module -Name Microsoft.PowerApps.PowerShell -AllowClobber
Set-AdminPowerAppApisToBypassConsent -AppName {APPID}
Replace {APPID} with the App Id of “Safe Workplace”. To know more on getting your App Id
Issues and Feedback
To report any issues or provide feedback regarding the Safe Workplace Contact Tracing App, click here